Spectora Website & Hosting FAQs
How do I set up my email?
You can set up your Gsuite email with us directly! Details here: https://www.spectora.com/mail Alternatively, you can set up email through GoDaddy.
Do you write content for me?
The pages on our demo sites have placeholder content that is meant for you to put your own spin on. It tends to make more of an impact when it's your personality coming through.
We may be adding copywriting services in the near future.
Do I need a blog?
It's not mandatory but we recommend regular blogging to help your website's SEO & rankings. This is usually something most inspectors pay to outsource.
I want people to be able to pay and sign agreements on my website. How do I do that?
Your clients get an auto-generated email when you book an inspection that allows them to sign the Inspection Agreement and pay. There is no need to direct clients to your site to have them pay. This makes it easier for clients and it's less for you to track.
Can I have online scheduling on my site? How does this work?
Absolutely! This is part of the power of having us make your website. We need you to setup your services & fees and activate your online scheduler first. Then we can embed your online scheduler into your site!
Depending on the settings you choose in Settings>Online Scheduler, your clients will flow right into the agreement and payment once they book an inspection, or get an automated email once you confirm the inspection in your Spectora dashboard.
What happens if I cancel? Do I own the website?
Yes, you can export the data and integrate into your own setup and hosting. We use a Wordpress Multisite Network. You will need to work with your own web developer to handle that the technical implementation, as each new host and setup can vary. We send you the XML file that contains all of the contents of your site (images, pages, posts, etc.) for importing into your new Wordpress instance.
Any images you provide you of course retain ownership of, as well as all the content etc. We use a paid commercial Wordpress theme for all our sites, so if you wanted to use the same theme you'd have to buy an individual license for yourself. You would also need to re-add any plugins that you want to continue using on the new instance of your site.
More FAQs here
How to request edits to your website
Fill out the form below to request edits to your website. This is the quickest way to get a response because this form goes to everyone on our website team.
What's included with managed hosting?
Here are some of the benefits you get with a Spectora Managed Hosting Plan:
- SSL Certificate (HTTPS)
- Unlimited website edits with priority 24-hour response times
- Agent promo page created for you
- Repair Request Builder page created for you
- First-look and implementation of new marketing pages/integrations
The extra cost for this will depend what your current hosting plan is. We will prorate and credit you back for the remainder of your current plan if you want to upgrade.
If you're interested in a Spectora Managed Hosting account, please contact us via the online chat or at websites@spectora.com.
What do HTTP and HTTPS mean?
For those not familiar with what HTTPS means, here is a definition:
Hyper Text Transfer Protocol Secure (HTTPS) is the secure version of HTTP, the protocol over which data is sent between your browser and the website that you are connected to. The 'S' at the end of HTTPS stands for 'Secure'. It means all communications between your browser and the website are encrypted. HTTPS is often used to protect highly confidential online transactions like online banking and online shopping order forms.
Basically it's a more secure way of transmitting data to and from your website.
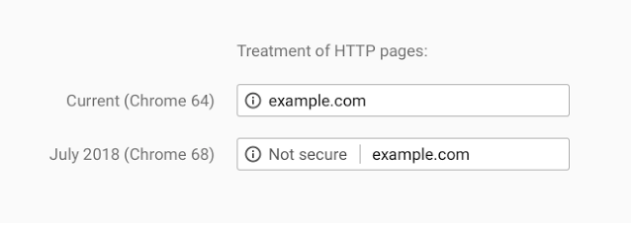
Starting July 2018 Google is marking sites that are on http protocol as "not secure" in the address bar.
Google has also confirmed that this is a small SEO ranking factor that can help/hurt you in search results.
How to deal with website spam
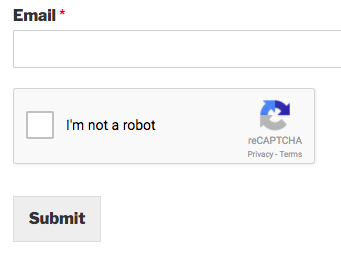
Want to stop spammers from filling out your forms? Google’s reCAPTCHA allows you to add human verification technology to your forms.
ReCAPTCHA is a free service provided by Google. There are two versions of reCAPTCHA available for your forms:
Checkbox reCAPTCHA: The user must check a box to confirm that they are human.
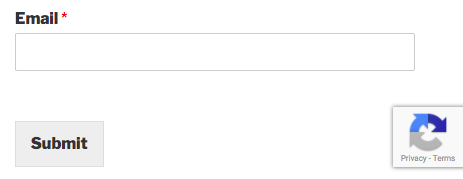
Invisible reCAPTCHA: The user won’t need to click anything within your form. A small badge is added to the lower right corner of the screen that links to Google’s terms of service and privacy policy.
Note: Each reCAPTCHA type requires a different set of keys, so if you later decide to switch types you will need to generate a new set of keys.
See how to add Google reCAPTCHA to your website here.
How to add social media links to your Spectora website
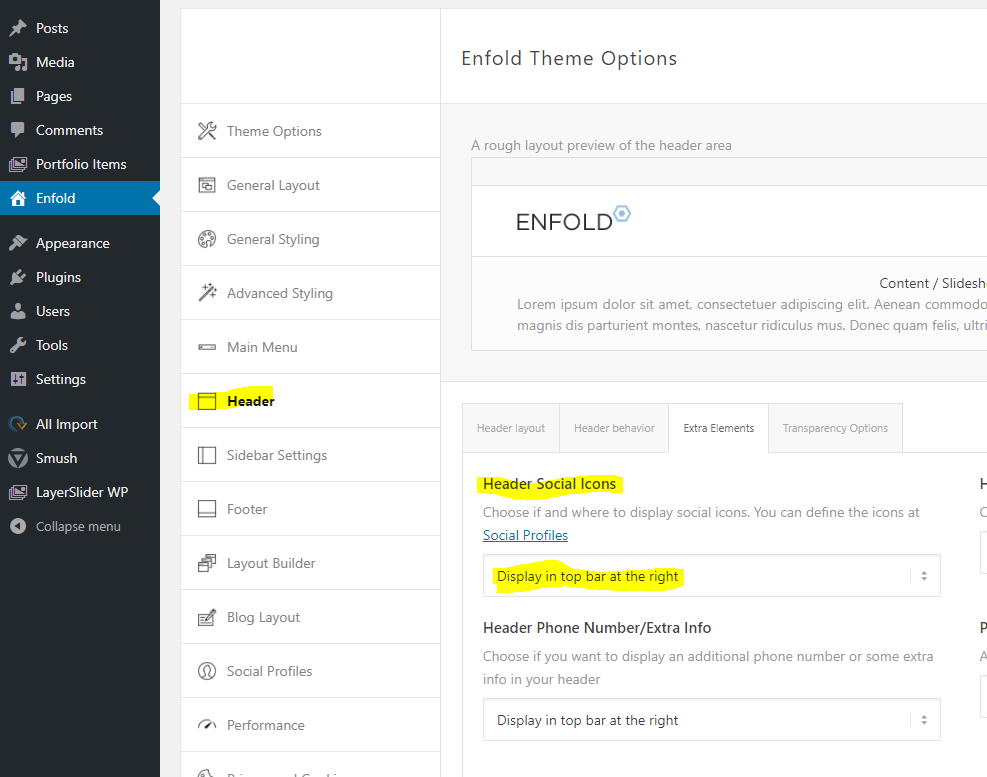
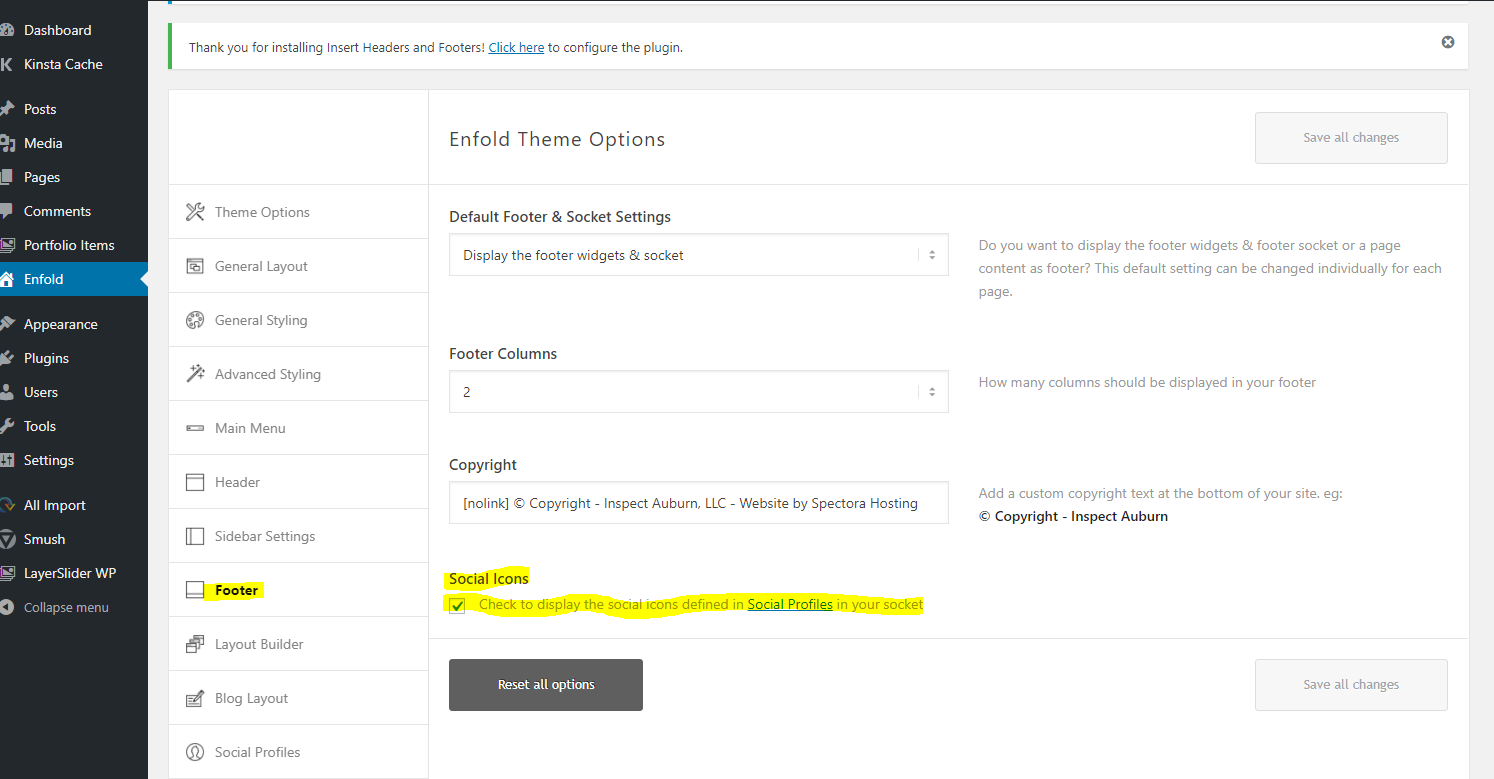
In your Wordpress dashboard, Go to "Enfold" on the left side then select "Social profiles" on the new left menu that pops up.
Also check to make sure the header and footer options are set to display social media icons
How to add a Google map to your website
If you're using Google Maps or our reviews plugin, you'll need to generate your Google API Key.
Google has recently started cracking down on usage of their Maps and Places data. If you use a Google Map or reviews plugin, this relies on Google's data.
How to Create Your Google Places and Maps API Key
You'll need to create what's called an API key (it's really just clicking a few buttons) in your Google account that gives the Wordpress reviews plugin permission to pull new reviews from Google as you get them.
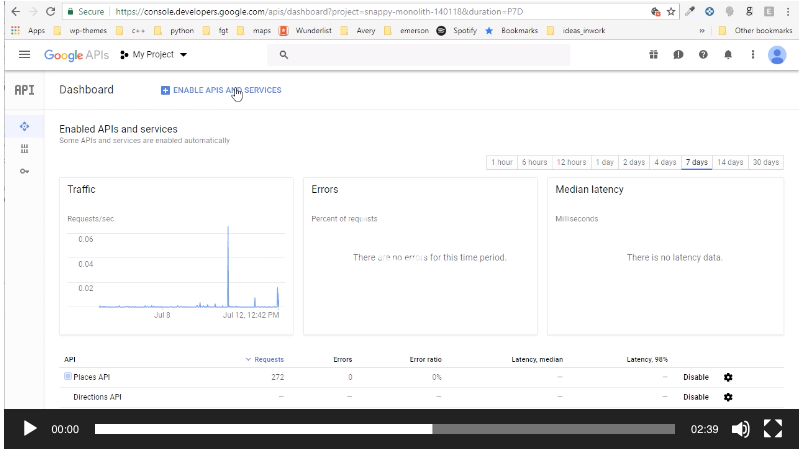
- Start on your console page.
- Follow along with the video below.
- Finally, Google now requires an active billing account. If you don’t have one, set it up here… Don't worry, most inspector sites will stay under their paid limits and will never have to pay for this service.
https://mapsplatformtransition.withgoogle.com/auth_required
Watch here:
Woo! Now you have 2 options, if you feel comfortable you're more than welcome to insert this info into your Wordpress Site OR you can email us the keys/info directly at Websites@spectora.com
How to set up your blog
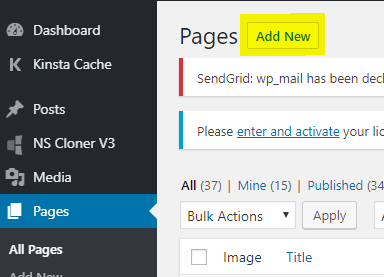
So, the way a blog works is this: Any new posts will show up under your blog. First you need to Add a New Page called "blog" or whatever you want to call it. You don't need to put any text on the page, just enter a title and submit.
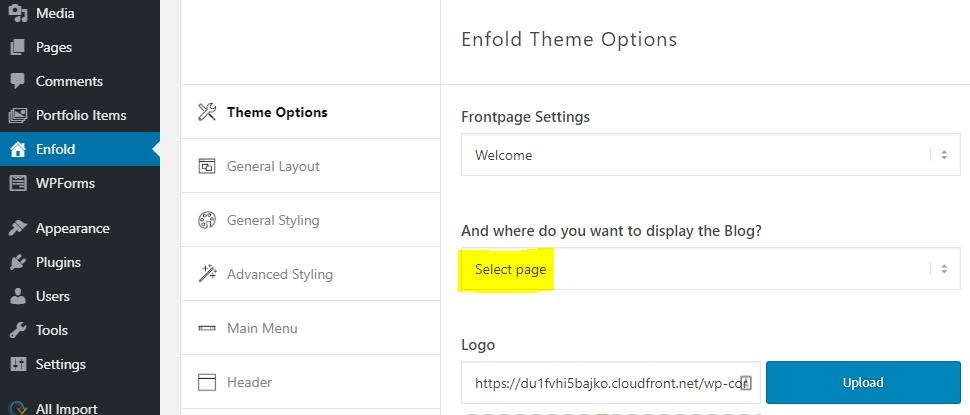
Then go to Enfold > Theme Options and where it says "And where do you want to display the Blog?" select the Blog page you just set up.
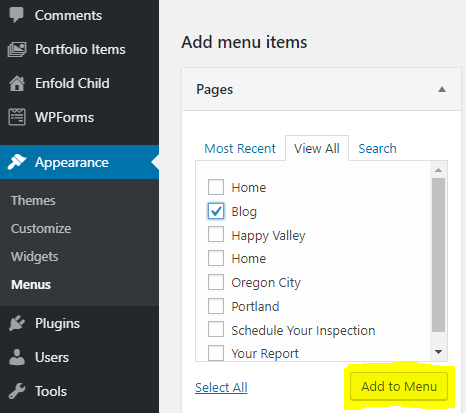
Then you probably want to add it to your menu so people can see it on your site. You can do this by going to Appearance > Menus and adding the blog page to your menu.
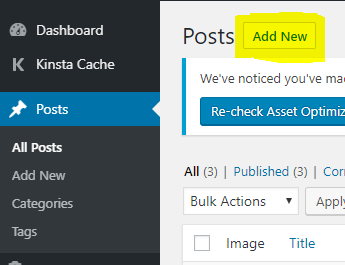
Once that's done, make your first blog post by going to Posts > Add New.
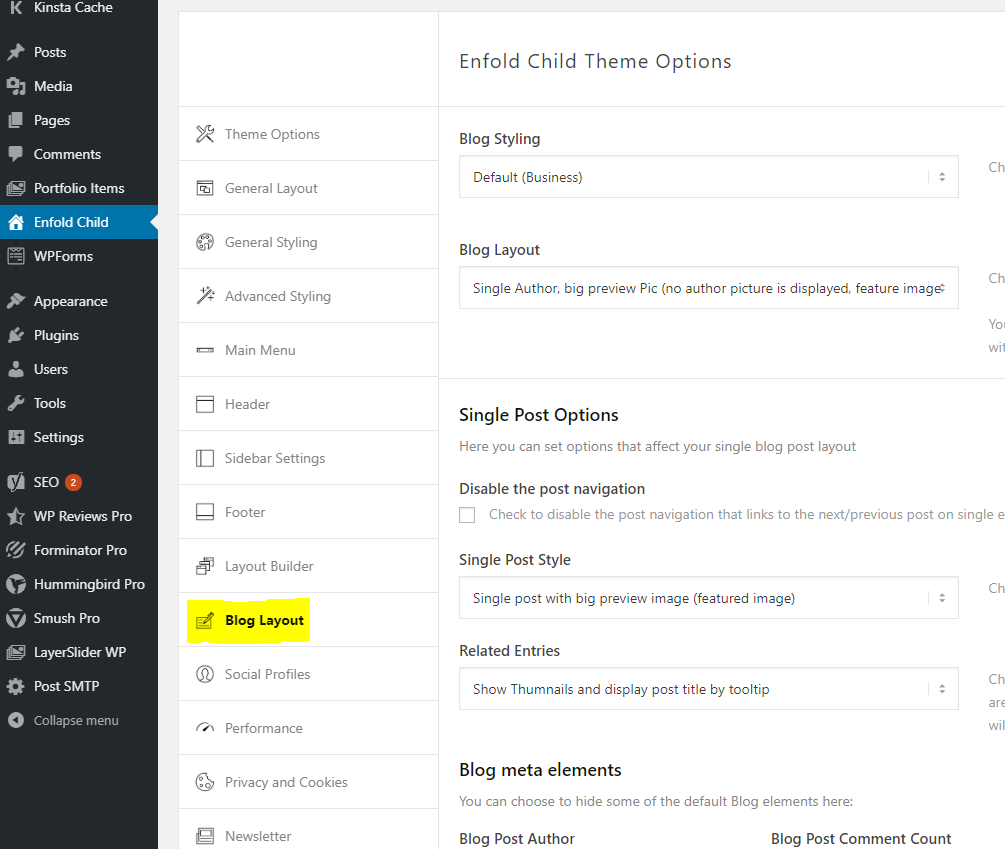
You can modify the look of your blog in the Enfold settings under Blog Layout.
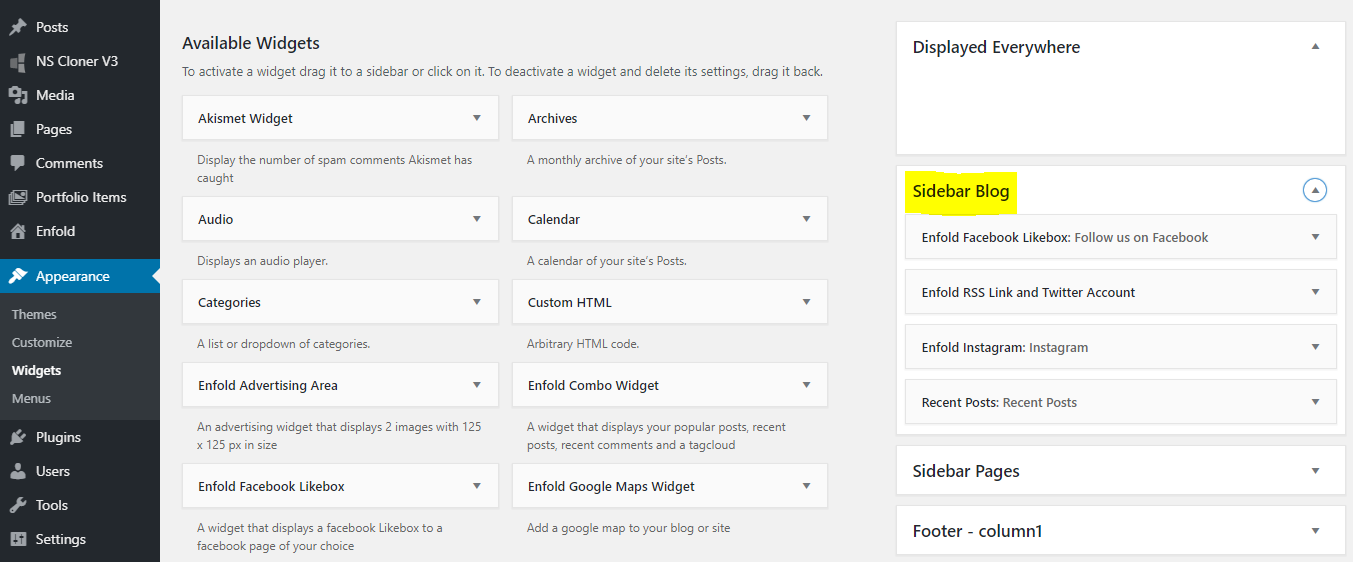
There might be a sidebar that shows up by default, you can edit it under Appearance > Widgets > Sidebar Blog.
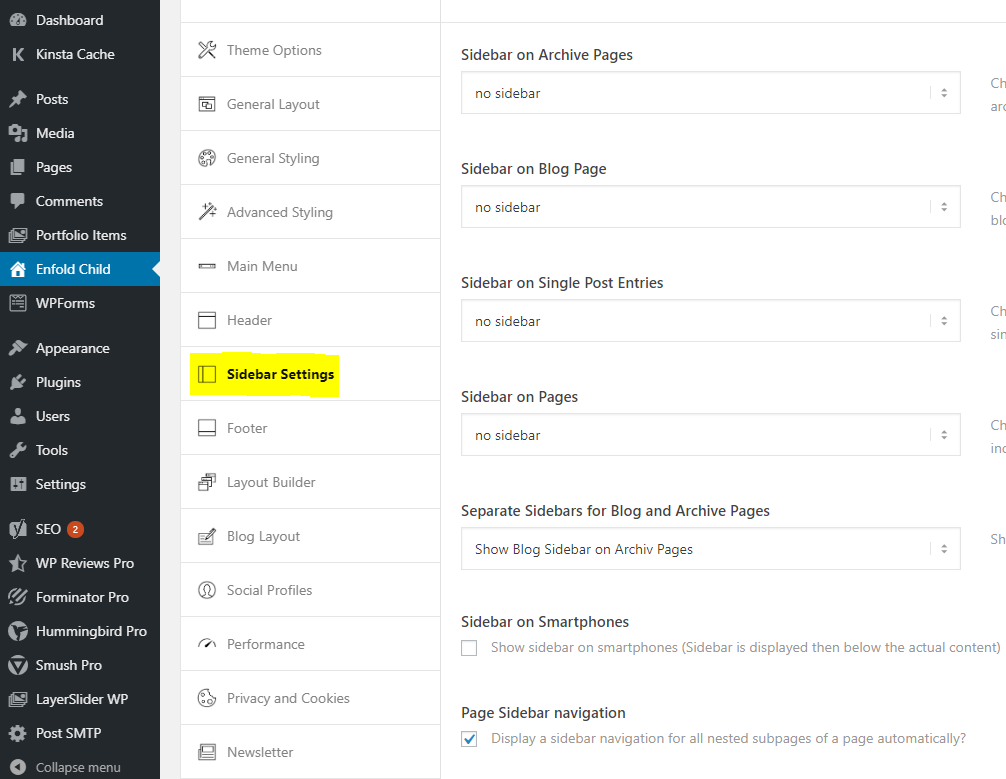
Or remove the sidebar by going to Enfold > Sidebar settings.
How to customize bold elements of your site
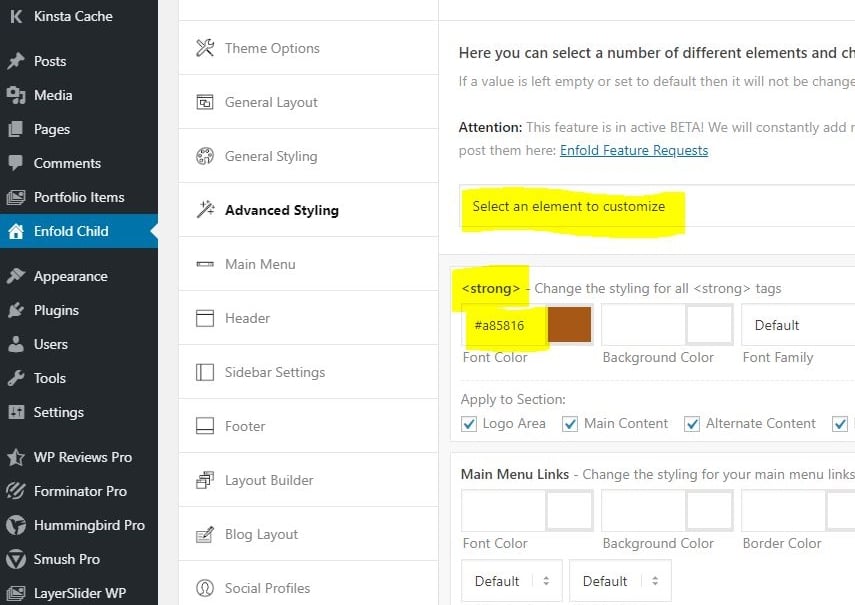
Enfold by default will make any bold text match your theme color. You can change this by going to Advanced Styling - Select an element to customize - and then choose the font color you want.
How to optimize elements of your site for mobile or tablet
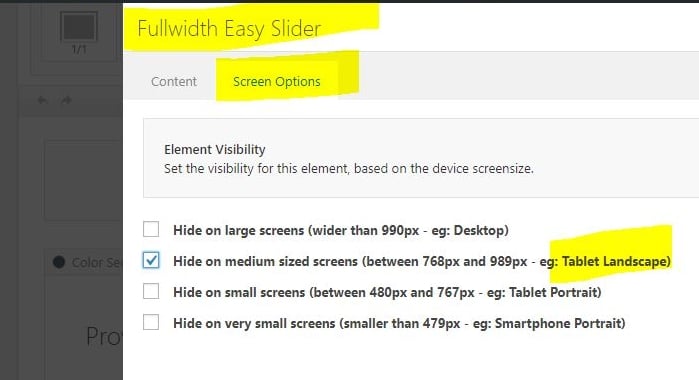
Enfold has a cool feature where you can customize the sections of your site for different size screens. Select the element you want to resize then go to Screen Options and check the box that corresponds to the device you want to optimize for. For example, if it looks fine on desktop and tablet but not mobile then check "Hide on extra small screens".
Now, duplicate the element and edit it however you want to look good on that device. Then go into the screen options and check the boxes to hide it on the other devices. For example, if you're optimize this element for mobile then check the boxes corresponding to desktop and tablets.
How to add custom code to your site
You might have an affiliate logo or widget you want to embed on your site. Usually they provide a snippet of code. There are several ways to add code to your website. The most common ways are to either add the code to a code block or a widget.
How to add a code block
A code block is a customizable block that you can add to any page of your site. This is ideal for something you only want to display on one page (as opposed to something you want to appear in a sidebar, footer, etc)
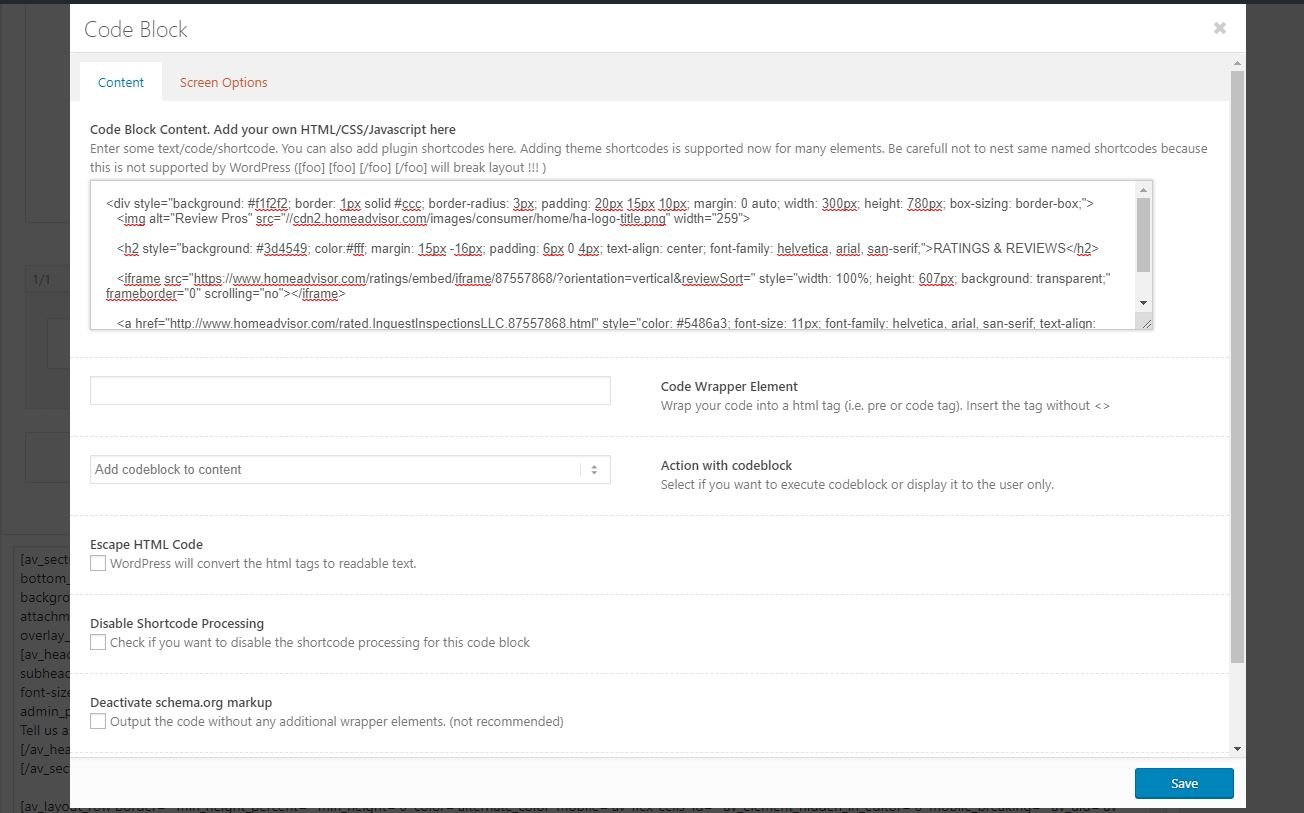
Go to the page you want to add your code to and select the Code Block element from the Avia Layout Builder.

Click and drag it to wherever you want it to appear on your site. Then copy and paste your code and hit save.
Update your page and take a look!
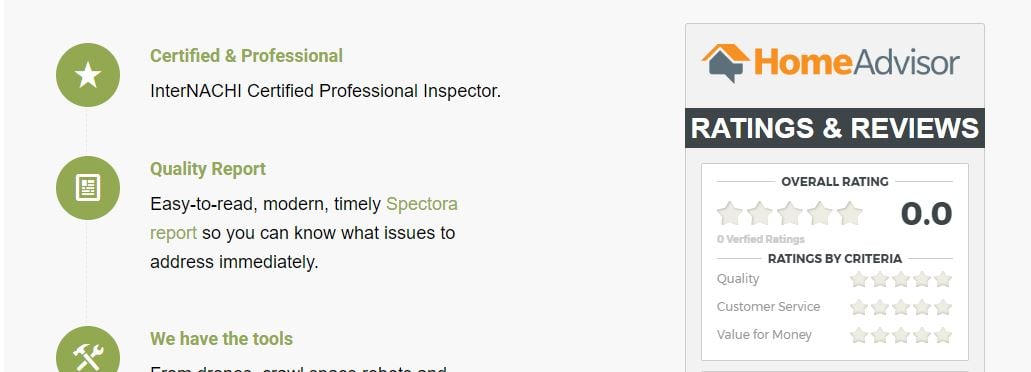
If it didn't work or looks weird, try moving it somewhere else on the page or contact us for help!
How to create a widget
A widget is a customizable block that you can add to any area of your website. This is ideal for affiliate logos that you want to display on multiple pages of your website.
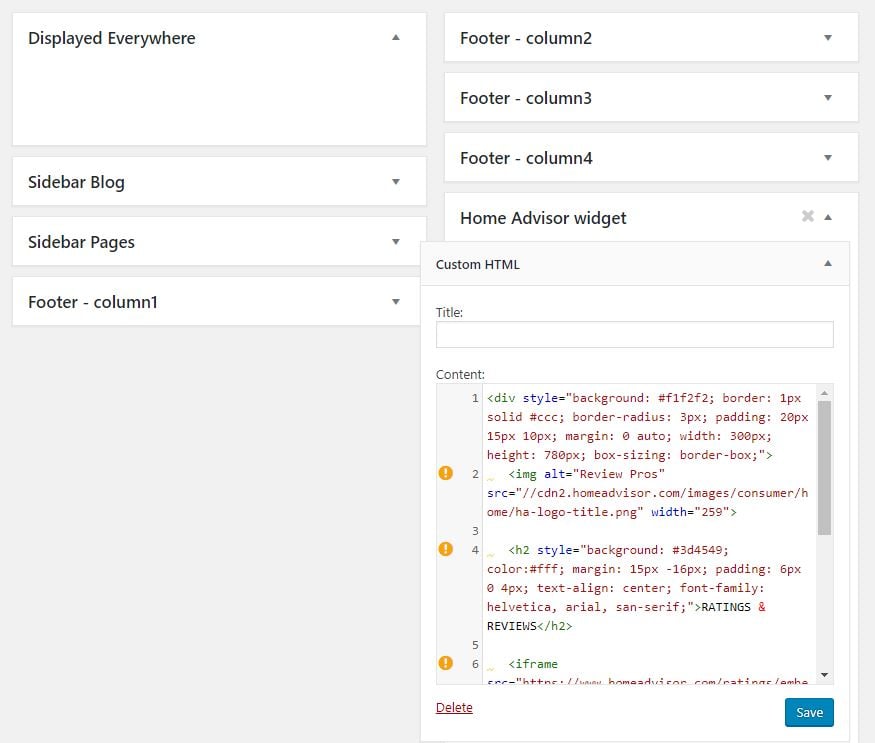
Go to Appearance - Widgets and add a new widget area. Name it after whatever the code is for so you can find it easily. In this example, we're adding a Home Advisor widget.
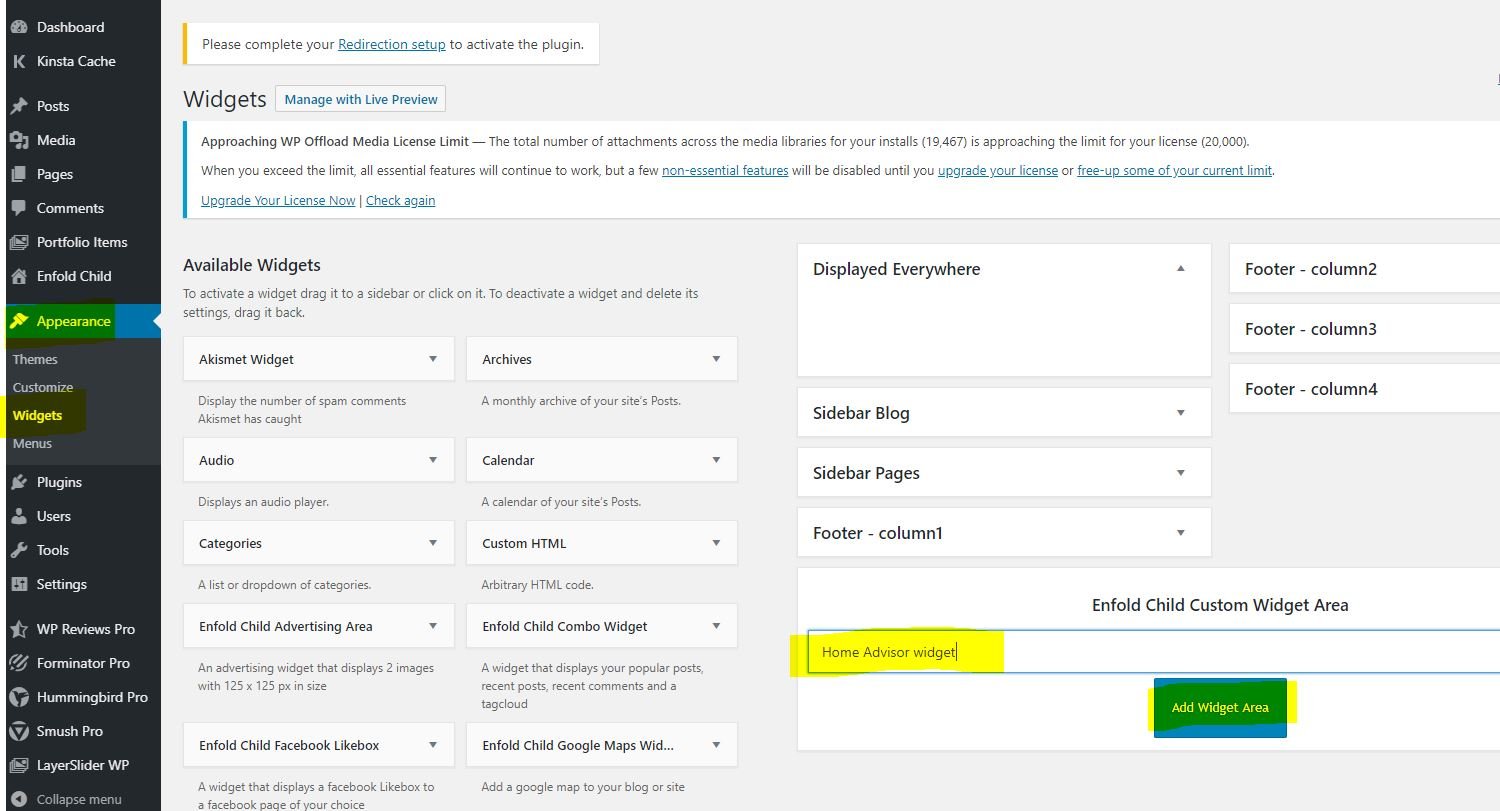
After you've created the widget area, drag the "Custom HTML" widget into your new widget area.
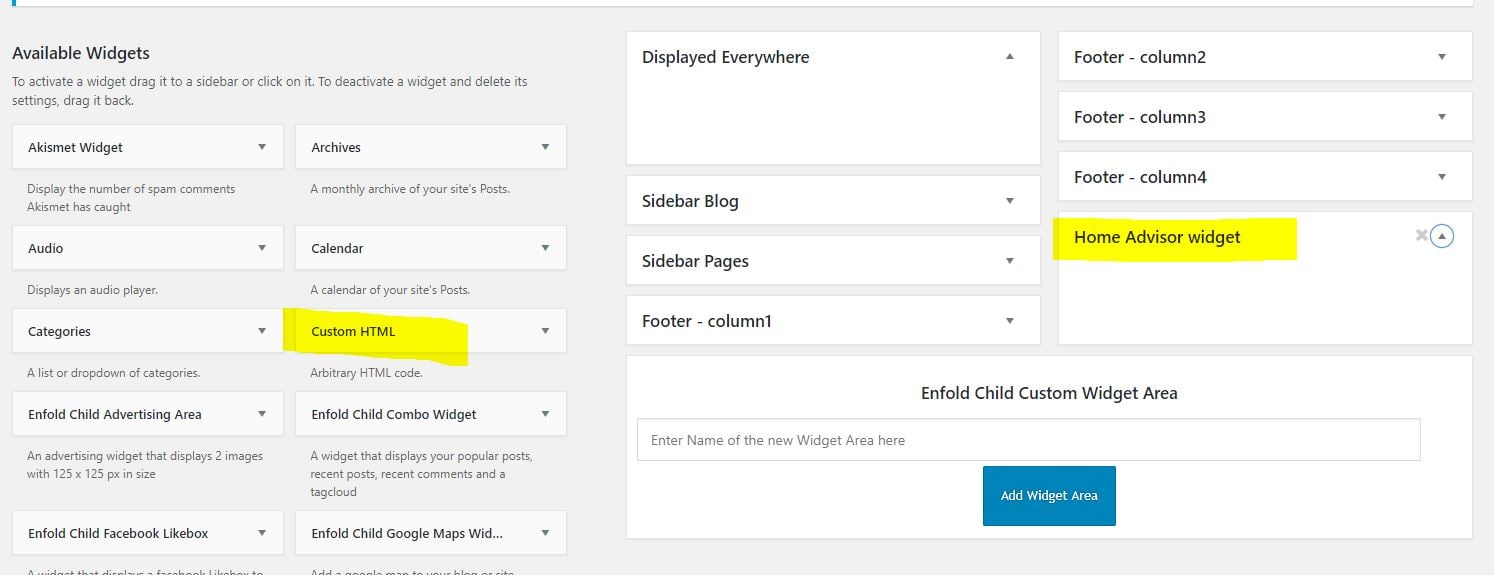
Then, copy and paste your code snippet into the Custom HTML content window. Don't worry about giving it a title unless you want one. Click Save and Done.
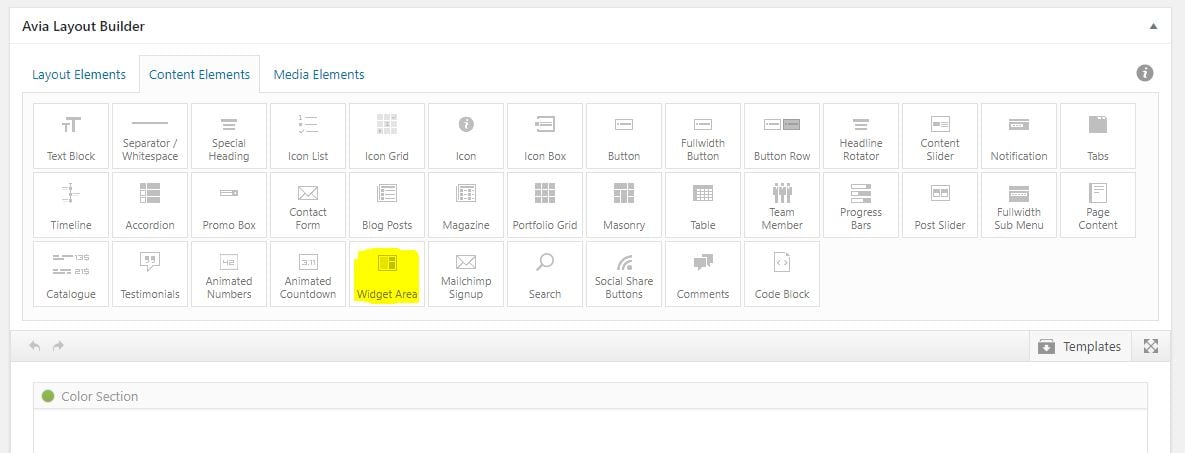
Now, decide where you want the widget to go. Open the page where you want to add the widget and go to Avia Layout Builder - Content Elements and select "Widget Area".
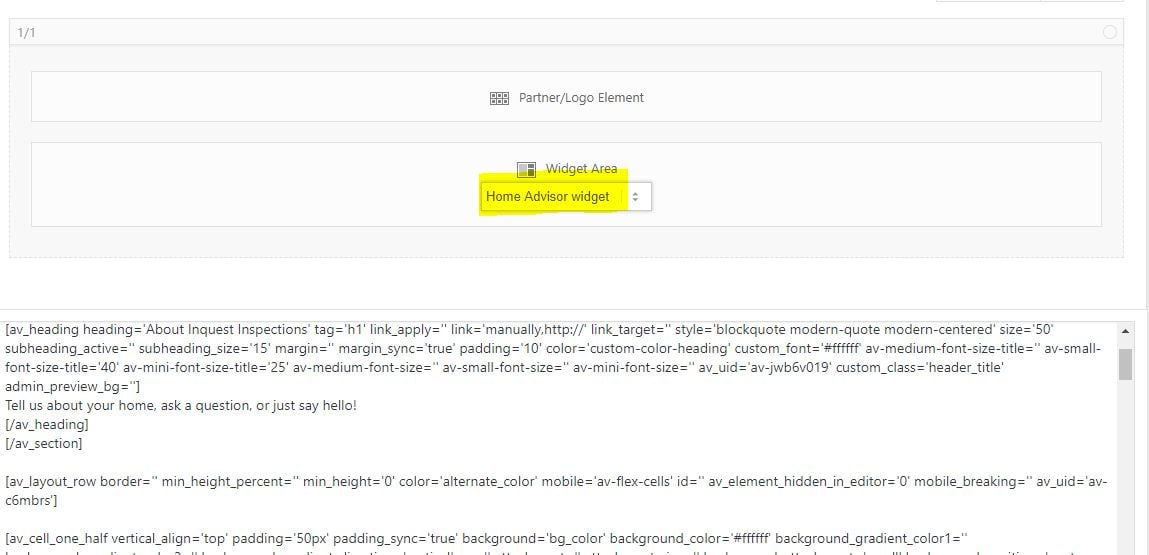
Drag the widget area to wherever you want it to go on the page just like with any other layout element. Then select the custom widget area you set up from the dropdown.
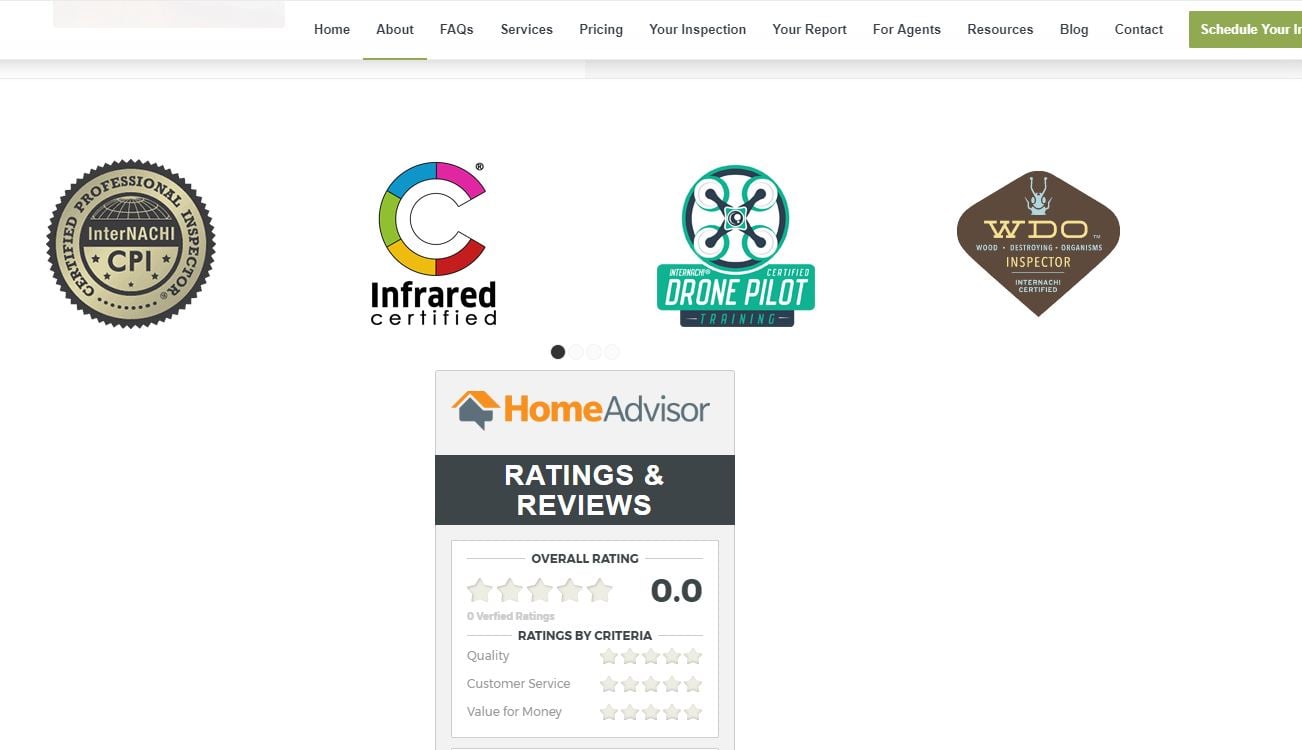
Save your page and take a look! It should have worked.
Now, if you want to add the widget to the footer of your website so that it shows up on every page, just go back to Appearance - Widgets and make a copy of the Custom HTML widget for your Footer widget area. *Note - your website may have a custom footer if it was built with extra love. In this case, go to Pages - Footer and add the widget just like we did in the above example.
